Years ago I was given a decent writing desk by a family friend that was moving and couldn't take it with her. At the time my small apartment was unremarkable and under-furnished so I was extremely grateful for the new addition but as time has gone on, and homes have changed, I have come to realize that blond wood is just not my style. I have always liked the lines of the piece and the size is great but the color never fit in with the rest of my house. I'm sad to say it took me so long to makeover this desk but the end result is well worth the wait.
Here is what I was starting with.
First thing I did was choose a deeper paint color that would work with the dark wood furniture I had throughout the house. I went with Rustoleum Kona Brown - which I love because it adheres to anything with no sanding required.
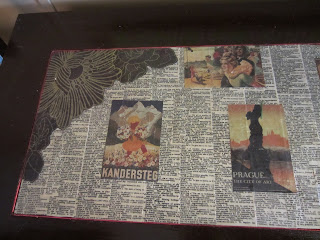
I only painted the sections that would not be covered and made sure I had 3 thick coats on. It only seemed fitting, that since this was a writing desk my decoupage medium should have to do with words - dictionary pages! Goodwill had one that was screaming to be cut up for only 59 cents.
The flat sections were a cinch to do - just cut paper to size, brush on Mod Podge, smooth on paper, apply more Mod Podge, let dry - however, the legs proved to be a more tedious job that spanned more than one night. I ended up just cutting strips of paper in varying sizes and tried my best to keep the words vertical.
Once all the surfaces were covered that needed to be, I took a step back and realized my work was not done yet - it needed something else, some color. Digging through my stash of scrapbook paper, I found a page that looked like old postcards and a couple large abstract flowers that would do the trick.
Finally I was able to apply a couple coats of polyurethane and give it a home in the dining room.
Yet, the top of the desk had a grove carved into it that did nothing more than annoy me by gathering crumbs and dust. How do I fix it? I thought about filling it with joint compound before I started painted but I wasn't sure I would achieve a smooth finish so once the entire thing was done I used glue and round ribbon/cording to fill in the recessed area.
And since I had extra, I used it to add detail to the legs.
Ready for the big reveal? Don't mind all the Christmas decorations, but here it is...
I even found a chair at the thrift store that went perfectly once I painted it in the same color brown.


No comments:
Post a Comment